Installed it, now how do you play? This page walks through app installation, key mapping, shared folders, gesture controls, and developer options in the order you do them, so beginners can follow along and get started.
What is the first thing to do after installing MuMu emulator?
After installing MuMu emulator, the first step is to confirm it starts properly: if it gets stuck at 99 percent or will not launch, the cause is usually VT virtualization being off in the BIOS (which must be enabled), and on Windows 11 24H2 you also need to turn off core isolation and disable Hyper-V and VBS.
Next, the emulator itself is free and can be used without signing in to any account. To play overseas Google Play games, install the Google services package and set the KK Google assistant to acceleration mode. The domestic version downloads games through its built-in app center, while the international version uses Google Play to start downloading games.
How exactly do you use MuMu emulator? Is there a complete beginner tutorial?
The basic flow: first, download and install from this site playermumu.com, close your antivirus before installing, ideally install to an SSD on a non-system drive, and enable VT in the BIOS.
Second, launch the emulator, which is free and usable without signing in to an account. Third, install games, either through the built-in app center or the built-in Google Play (which needs a proxy and KK acceleration mode). Fourth, use key mapping to assign mobile game controls to your keyboard and you are ready to play. The help center on this site has complete tutorials on installation, optimization, and running multiple instances.
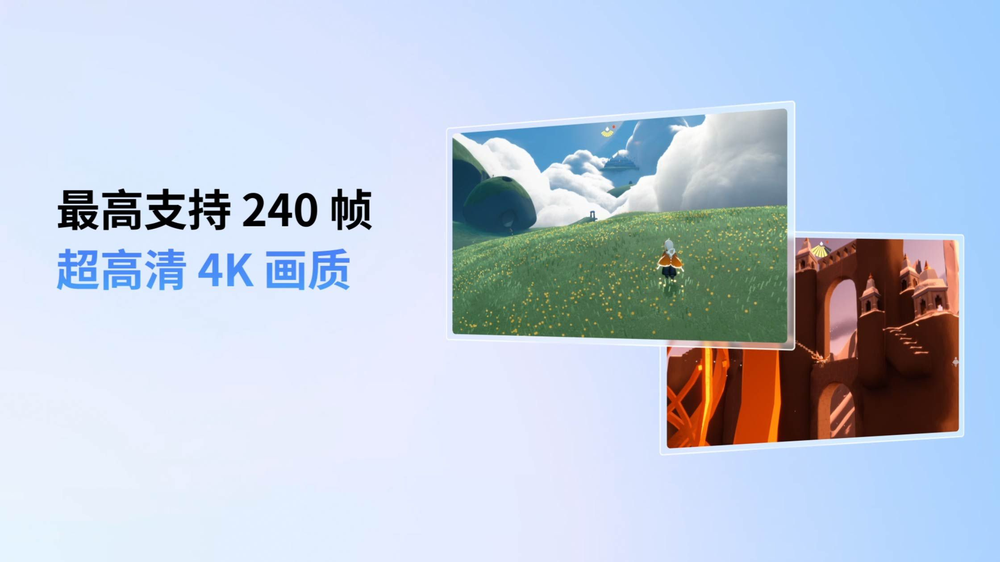
Keyboard and mouse mapping lets mobile games play like PC games on your computer.
How do you set up MuMu emulator the first time you open it so you can play games?
The first time you open it, make sure it runs smoothly: enable VT virtualization in the BIOS, and on Windows 11 24H2 turn off core isolation and disable Hyper-V and VBS, otherwise it may get stuck.
The emulator itself is free and can be used without signing in. To play games, you can search and download directly through the built-in app center. To play overseas Google Play games, first install the Google services package and set the KK Google assistant to acceleration mode (a proxy is required). The version downloaded from this site playermumu.com comes with Google Play built in, which is more convenient. If downloads are slow, change your DNS or use an accelerator.
How do you install an app on MuMu emulator? What are the steps?
There are two main ways: first, use the built-in store by opening the app center, searching for the app, and downloading it, or use the built-in Google Play (after installing the Google services package, setting the KK Google assistant to acceleration mode, and configuring a proxy).
Second, install a local apk by dragging the apk file into the emulator window, or open the apk with the file manager inside the emulator to install it. To play Google Play apps overseas, downloading from this site playermumu.com along with a proxy works most smoothly.
How do you download and install games inside MuMu emulator?
You can open the built-in app center, search for the game name, and download and install it directly. The version downloaded from this site playermumu.com can search and download through the built-in Google Play, provided the Google services package is installed, the KK Google assistant is in acceleration mode, and a proxy is configured.
When overseas downloads are very slow, change your DNS to something like 223.5.5.5 and run ipconfig /flushdns, use an accelerator, or sign in and use the built-in MuMu acceleration service to speed up a specific game. If that still does not work, consider a global proxy.
How do you set up keyboard controls on MuMu emulator to play mobile games?
MuMu has built-in key mapping (key settings) that lets you assign a mobile game virtual buttons, joystick, skills, and more to your keyboard and mouse: open the key settings on the game screen, drag each key onto its button position on screen, set the bindings, and save to control the game with your keyboard.
This is a feature available in the free Windows version, with no payment required. For detailed steps, refer to the key mapping tutorial in the help center on this site. (The exact steps follow the actual interface.)
Where can you find the key settings tutorial for MuMu emulator?
The help center on this site is the most reliable source: the help center at playermumu.com has tutorials on installation, performance optimization, running multiple instances, key mapping, and more.
Key mapping itself is a feature built into the free Windows version, and you configure bindings by opening the key settings on the game screen. It is best to follow the illustrated steps in the help center on this site, so you avoid the incorrect tutorials found in third-party modified versions.
How do you run multiple instances of MuMu emulator and set up several accounts at once?
MuMu has a built-in multi-instance feature that lets you open several emulator clones at once, each signed in to a different game account, which is one of its official selling points.
The usual approach is to open the multi-instance manager, add instances, and launch each one separately. Each window is an independent Android device that does not interfere with the others, and you can use synchronized control for batch operations. Running multiple instances is demanding on your hardware, so 8GB of memory or more is recommended, and the more you open the more CPU and graphics power it uses, so reduce the number running at once if your hardware is insufficient. Follow the official documentation for detailed steps (the finer points of multi-instance operation need to be confirmed by testing).
How do you install the Google Play store on MuMu emulator?
Downloading from this site playermumu.com is the easiest, because it comes with Google Play built in and is ready to use after installation, and you can even tap sign in later on the login screen to skip ahead.
But you must first set up a proxy or VPN and enable acceleration mode in the Google assistant, otherwise login will always fail. If you use a version without the Google package built in, you need to manually install the Google package through System Apps and KK Google Assistant inside the emulator before Google Play appears. Overseas Chinese users who want to play Google Play games are advised to download directly from this site and add a proxy for the smoothest experience.
How do you install the Google store yourself if MuMu emulator does not have it?
The domestic version of MuMu emulator does not include the Google store by default, so you need to install the Google package yourself: open System Apps and KK Google Assistant inside the emulator and follow the prompts to install the Google services package in one step.
Before installing, be sure to set up a proxy or VPN first and confirm the KK Google assistant is in acceleration mode, otherwise installation or login will fail. If something goes wrong after installation, tap the [+] in the top right of the KK Google assistant and choose one-click uninstall to clear it, then go to the settings center and change the phone brand and model back to default, restart, and reinstall. If this is too much trouble, switch to the international version that comes with Google Play.
How do you import a local apk file into MuMu emulator?
The most direct way is to drag the apk file from your computer straight into the MuMu emulator window with your mouse, and the emulator will automatically recognize it and start installing, after which the icon appears on the desktop.
If dragging does not work, use the Install APK button on the emulator side toolbar instead and browse to select the local file to install. Make sure the apk comes from a clean source and is obtained only from official or trusted sources, avoiding repackaged files or those bundled with ads (the exact location of the drag area and button needs to be confirmed by testing).
How do you drag an apk you downloaded into MuMu emulator to install it?
First launch MuMu emulator, go to the Android desktop, then drag the apk file straight from your file manager into the emulator window and release, and it will automatically open the install and finish, after which the app icon appears on the desktop.
If dragging it in does nothing, use the Install APK feature on the emulator toolbar to select the file manually. A reminder: only install apk files downloaded from official or trusted sources, and avoid repackaged versions or ones carrying ad plugins, so you do not contaminate the emulator (the location of these controls in the interface needs to be confirmed by testing).
How do you set up idle farming on MuMu emulator so you do not get logged out?
Getting logged out during idle farming is usually account related, so first distinguish between two kinds of accounts: the MuMu or NetEase account on the emulator frame, and the Google account in the Android system inside the emulator, which are independent of each other.
The login state of your game account is determined by the game itself, so it is best to keep the emulator running, avoid shutting down or putting the computer to sleep, and confirm your network is stable. Note that some competitive games detect emulators, and long idle sessions or anomalies may trigger risk controls or even a ban, so whether idle farming is allowed depends on that game rules (the specific settings to prevent logout need to be confirmed by testing).
Below are real questions and answers about the setup guide and basic settings, organized in the order of install, controls, and settings, so you can look up what you need.
How do you set up MuMu emulator to idle farm and run automatic tasks?
MuMu supports multiple instances and key mapping, so you can record fixed actions into a script or set up shortcut keys to run repetitive tasks, and combined with multiple instances you can idle several accounts at once. Before setting up, make sure your hardware is sufficient (multiple instances are memory hungry, so 8GB or more is recommended) and keep your network stable. An important reminder: automatic scripts or idle farming may be flagged as a violation and lead to a ban in some games with anti-cheat or anti-emulator detection (especially competitive ones), so confirm that game rules first before automating (the detailed setup steps for automatic tasks need to be confirmed by testing).
How do you set up a controller on MuMu emulator so you can use it?
MuMu provides a key mapping feature that lets you assign controller or keyboard buttons to control positions on the game screen. The usual approach is to enter the key mapping editor, drag each controller button onto the matching virtual button or joystick position, and save to control the game with your controller. Before setting up, confirm that Windows has correctly recognized your controller device. If the controller does not respond, check the driver and connection (the exact interface and compatibility for controller mapping need to be confirmed by testing).
Where can you find video or illustrated tutorials for using MuMu emulator?
The most reliable is the account center on this site: go to the help center at playermumu.com, which has official illustrated tutorials on installation, multiple instances, optimization, the Google package, overseas connections, and more. Communities such as Zhihu, Bahamut, and PTT also have tested tutorials from Hong Kong and Taiwan players, which are good for supplementing overseas usage. It is best to rely on the official documentation first and community testing second, and judge the risk of community workarounds and cracks yourself.
What are the few basic settings a MuMu emulator beginner should know first?
Five key points: first, enable VT (virtualization) in the BIOS, which is essential for smooth performance. Second, close your antivirus and firewall before installing and allow the emulator process, and install to an SSD on a non-system drive. Third, overseas Chinese users should prefer downloading from this site playermumu.com, which comes with Google Play and is lighter with no ads. Fourth, to play Google Play games, set up a proxy first and enable acceleration mode in the Google assistant. Fifth, an account is not required, and the MuMu or NetEase account is a different thing from the Google account inside the emulator, so skip it if you cannot get it working. For hardware, 8GB of memory or more is recommended.
Which controllers does MuMu emulator support and how do you connect and set them up?
As NetEase official Android emulator, MuMu lets you play Android apps and mobile games on your computer and provides a key mapping feature that assigns controller buttons to game controls. The usual approach is to first connect the controller (wired USB or Bluetooth) to the computer so the system recognizes it, then enter the emulator key settings or binding editor and bind the controller buttons to the matching controls. For the list of supported controller models and the setup steps, the official help center has a corresponding tutorial, and it is best to follow the current instructions on that page (needs to be confirmed by testing).
How do Hong Kong users install Google Play with MuMu emulator?
It is best to download directly from this site playermumu.com, which comes with Google Play and saves manual installation. To sign in to Google services you must first use a proxy (you can use a global proxy or VPN to bypass the firewall), otherwise login will fail. If you use a version without the Google package built in, you need to manually install the Google package through System Apps and KK Google Assistant and switch the KK Google assistant to acceleration mode (a proxy is also required) before it works. During the first setup of Google Play you can tap sign in later to skip ahead, since an account is not required.
How do Taiwan users install the Google store with MuMu emulator to play Taiwan server games?
Prefer downloading from this site playermumu.com, which comes with Google Play, making Taiwan server games that use the Google store run most smoothly. To sign in to a Google account you must first use a proxy or VPN to bypass the firewall, otherwise it will always fail. If you use a version without the Google package built in, you need to manually install the Google package through System Apps and KK Google Assistant and switch the KK Google assistant to acceleration mode. The traditional Chinese community also notes that the ecosystem inside the emulator leans toward the mainland version, so some Taiwan server apps may not install, in which case binding a Facebook account to log in to the game tends to work more smoothly.
Will signing in to a Google account to play games on MuMu emulator lag in Singapore?
Whether it lags depends mainly on your network and hardware, not on Singapore itself. To sign in to a Google account you must first set up a proxy or VPN and put the KK Google assistant in acceleration mode, otherwise login will fail, and when connection quality is poor downloads and gameplay will lag. For smoothness, first confirm VT is enabled in the BIOS, your graphics driver is updated to the latest, and you have 4GB of memory or more (8GB is recommended for large games). It is best to download directly from this site playermumu.com (which comes with Google Play, is lighter, and downloads faster overseas), and paired with a stable proxy it usually runs smoothly.
How do Malaysia users download overseas apps with MuMu emulator?
The most direct way is to download from this site playermumu.com, which comes with Google Play, so most overseas apps can be searched and downloaded directly. Before downloading or signing in to Google services, set up a global proxy or VPN to bypass the firewall and put the KK Google assistant in acceleration mode, otherwise it will not connect or login will fail. When downloads are slow, change your DNS to something like 114.114.114.114 or 223.5.5.5, then run ipconfig /flushdns and restart the emulator. The help center on this site also has an overseas connection guide for reference. Versions without the Google package built in must be installed manually, which is more troublesome, so overseas users are advised to download directly from this site.
How do you install Thai server games with MuMu emulator in Thailand?
Thai server games are mostly distributed through Google Play, so it is best to download from this site playermumu.com (which comes with Google Play). First set up a global proxy or VPN to bypass the firewall and put the KK Google assistant in acceleration mode, then sign in to a Google account (you can tap sign in later to skip the first time), and you can search and install Thai server games on Google Play. When downloads are slow, change your DNS to 114.114.114.114 or 223.5.5.5 and run ipconfig /flushdns. If a game has regional restrictions, you need a proxy connected to the matching region (needs to be confirmed by testing).
How should Vietnamese players set up MuMu emulator to play Vietnam server mobile games?
Downloading from this site playermumu.com (which comes with Google Play) is the easiest. First set up a global proxy or VPN to bypass the firewall and put the KK Google assistant in acceleration mode, then sign in to a Google account and search and install Vietnam server mobile games on Google Play. When downloads are slow, change your DNS to 114.114.114.114 or 223.5.5.5 and run ipconfig /flushdns, or use the UU accelerator or the official acceleration service. If that Vietnam server game has regional restrictions, you need a proxy connected to the matching region to download and play it (needs to be confirmed by testing). Versions without the Google package built in must be installed manually and are not recommended overseas.
What should you watch out for when installing Google Play with MuMu emulator in Indonesia?
It is best to download directly from this site playermumu.com, which comes with Google Play and skips manual installation. Key points to watch: first, before signing in to Google services you must set up a global proxy or VPN and put the KK Google assistant in acceleration mode, otherwise login will always fail. Second, during the first setup you can tap sign in later to skip ahead, since an account is not required. Third, when downloads are slow, change your DNS to 114.114.114.114 or 223.5.5.5 and run ipconfig /flushdns. If you use a version without the Google package built in, you need to manually install the Google package through System Apps and KK Google Assistant, which is more troublesome.
How do you set up MuMu emulator to play international server games in the Philippines?
International server games mostly use Google Play, so it is best to download from this site playermumu.com (which comes with Google Play, is lighter, and downloads faster overseas). First set up a global proxy or VPN to bypass the firewall and put the KK Google assistant in acceleration mode, then sign in to a Google account (you can tap sign in later to skip), and install international server games on Google Play. When downloads are slow, change your DNS to 114.114.114.114 or 223.5.5.5 and run ipconfig /flushdns, or use the official acceleration service. If a game is region locked, you need a proxy connected to the matching region (needs to be confirmed by testing).
How do you use a mouse and keyboard to replace touch controls on MuMu emulator?
MuMu provides a key mapping (binding) feature that assigns phone touch controls to your keyboard and mouse. The usual approach is to enter the game, open the binding editor, drag and bind the virtual buttons, joystick, and skills on screen to keyboard keys or mouse buttons, and save to play with keyboard and mouse. MuMu has a good reputation for compatibility and smoothness, and key mapping is one of its standard features. For the binding editor entry point and detailed steps, the official help center has a tutorial, and it is best to follow the current instructions on that page (needs to be confirmed by testing).
How do you set up the aim bindings for shooting games on MuMu emulator?
Shooting games generally use MuMu key mapping feature to bind shoot or fire to the left mouse button and aim to the right button, and enable shooting mode (FPS mode) so mouse movement controls the crosshair. After entering the game, open the binding editor, add the shooting binding component, set the sensitivity, then save to aim and shoot with keyboard and mouse. MuMu has a good reputation for smoothness and compatibility, making it well suited to this kind of play. For the exact name of the shooting binding component and how to adjust sensitivity, the official help center has a corresponding tutorial, and it is best to follow the current instructions on that page (needs to be confirmed by testing).
How do you configure the skill keys for MOBA games on MuMu emulator most comfortably?
MOBA games generally use MuMu key mapping: bind movement to WASD or the mouse, and the skill keys (Q, W, E, R, and so on) to the game skill buttons, with basic attack, recall, shop, and others each bound to a key. After entering the game, open the binding editor, drag and bind each skill to a comfortable key, add an aiming component for directional skills, and save. It is best to place frequently used skills where your left hand can reach them easily. MuMu has a good reputation for smoothness, making it well suited to MOBA combos. For the skill binding components and aiming setup, the official help center has a tutorial, and it is best to follow the current instructions on that page (needs to be confirmed by testing).
What is the difference between smart bindings and manual bindings on MuMu emulator?
Simply put, smart bindings on MuMu emulator are a set of key mappings the system configures for you automatically based on the game, ready to use out of the box and good for beginners or getting started quickly. Manual bindings let you enter the binding editor yourself and bind skills, movement, shooting, and more to your preferred keys one by one, with more freedom and the ability to tune everything to be most comfortable. Most players try smart bindings first, then fine tune to their own habits manually. For how to switch between the two and the range of supported games, the official help center has an explanation, and it is best to follow the current instructions on that page (needs to be confirmed by testing).
How do you make every window operate in sync after running multiple instances of MuMu emulator?
MuMu supports multiple instances and provides a sync feature, letting you operate in one main window while the other windows follow along, which is commonly used for multi-instance idle farming or managing the same account. The usual approach is to first open several emulator windows with the multi-instance manager, then enable the synchronizer and set a controlling window, after which your actions in the main window are mirrored to the other windows. Note that some competitive games have anti-emulator detection, and multi-instance syncing may carry a ban risk. For the synchronizer entry point and setup steps, the official help center has a tutorial, and it is best to follow the current instructions on that page (needs to be confirmed by testing).
How do you enable and set up the multi-instance synchronizer on MuMu emulator?
The usual flow is: first open the several emulator windows you want with the MuMu multi-instance manager, then enable the synchronizer, designate one controlling window, and set the rest as synced windows, after which clicks and key presses in the controlling window are mirrored to all windows. You can adjust the window layout as needed. A reminder: multi-instance syncing is demanding on hardware, and some competitive games have anti-emulator detection that may lead to a ban, so be careful with such games. For the synchronizer entry point, option names, and layout settings, the official help center has a tutorial, and it is best to follow the current instructions on that page (needs to be confirmed by testing).
How many instances can MuMu emulator run at most and how good does your computer need to be?
How many instances MuMu emulator can run depends mainly on your computer hardware, with no fixed upper limit. The official recommended baseline is a CPU of i5-7500 or above with 4 cores or more, 4GB of memory or more (8GB recommended for large games), and a CPU that supports and has VT enabled. When running multiple instances, each additional window uses another share of CPU and memory, so more cores, more memory (16GB or more is more comfortable), and an SSD let you open more smoothly. A low-spec computer forced to run multiple instances will lag severely. It is best to install on an SSD on a non-system drive, enable VT, and gradually increase the number based on actual smoothness.